





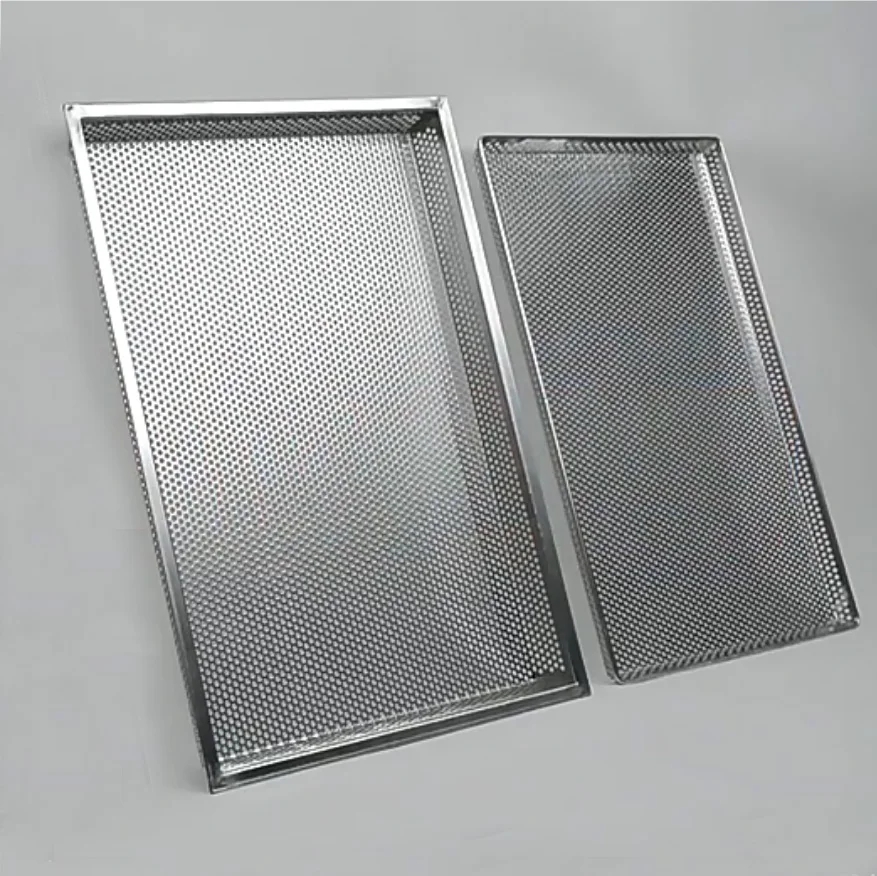
Custom Baking Trays: The OEM/ODM Manufacturing Process for Industrial & Commercial Bakeries
Why Choose a Custom Baking Tray for Your Bakery?
In industrial bakeries and food processing facilities, standard trays often fall short of meeting specific production requirements. A custom baking tray is more than just a sheet of metal—it's an engineered tool designed to maximize efficiency, ensure consistent baking results, and withstand the rigors of high-volume production. Whether you need a 600x400 baking tray for standard ovens or a specialized perforated tray for improved airflow, custom manufacturing offers the flexibility to optimize your processes. As an industrial tray manufacturer, we provide end-to-end OEM/ODM solutions tailored to your exact specifications.
Understanding the Custom Tray Manufacturing Process
The journey to your ideal tray begins with a structured collaboration. Our OEM/ODM process is designed to eliminate guesswork and ensure precision at every step. Below, we break down the primary stages involved in creating a custom metal tray that meets both your operational and quality standards.
Step 1: Application Confirmation (The Most Critical Step)
Before any metal is cut, we need to understand your intended use. This isn't just about size. Questions we ask include: Will the tray be used for baking bread, pastries, or roasting vegetables? Will it be placed on a rack, a conveyor, or a solid oven deck? Does it need to fit into a specific tray cart or standard 600x400 baking tray slot? This initial conversation ensures we recommend the right thickness, material, and design features from the start.
Step 2: Sharing Drawings or Samples
Once we understand the application, we move to design. You can provide a technical drawing, a 3D model, or simply send a physical sample. If you have neither, don’t worry—we can work from your basic measurements and application details. This stage is about translating your needs into a tangible blueprint.
Step 3: Specifying Length, Width, and Height (Tray Dimensions)
Dimensions are the backbone of your tray. Beyond the overall length and width, we must determine the edge height (the raised sides). Common sizes include 400x300 mm, 600x400 mm, and 800x600 mm, but your custom tray can be any size within our manufacturing capabilities. It’s crucial to consider both the oven cavity and the tray’s structural stability. For example, a tray that is too large may sag under the weight of dough, so we often add support features like a reinforced rim or a center brace.
Step 4: Selecting the Plate Thickness
Sheet thickness is a key factor in both durability and heat transfer. We typically offer thicknesses from 0.5mm to 2.0mm. A thinner tray (0.6mm) is suitable for light, dry goods and offers faster heat-up times. A thicker tray (1.2mm) is recommended for heavy loads or frequent handling. Your application dictates the choice. For instance, a tray for heavy buns might use 1.0mm, while a delicate macaron tray could use 0.7mm to promote even browning.
Step 5: Choosing the Right Material Grade
The material you choose affects hygiene, corrosion resistance, and cost. In the food industry, stainless steel is the gold standard. We offer grades like 201, 304, and 316 stainless steel. Grade 304 is your go-to for most baking applications. Grade 316 offers superior resistance to chlorides and acids, making it ideal for harsh environments. If you need a lightweight, fast-heating option, we also manufacture trays from aluminum alloys like 1060, 3003, or 5052. Aluminum is excellent for even baking, but it’s softer and may require thicker gauges for heavy loads.
Step 6: Perforation Patterns—The Perforated Tray Advantage
A perforated tray provides superior air circulation, which reduces baking time and improves crust texture. We can customize the hole diameter (commonly 1mm to 10mm), the hole spacing (or pitch), and the hole pattern (e.g., straight rows, staggered). These choices affect the open area (percentage of holes), which impacts airflow. A higher open area (e.g., 30%) is great for crisp foods, while a lower one (5%) may be needed for small items like seeds or dry ingredients.
Step 7: Edge Treatment: Rolled Edges, Wire Rolls, and Reinforcements
The edge of your tray is a critical safety and durability element. A rolled edge (also called a wire rim) adds structural strength and prevents sharp edges that can injure staff or damage oven racks. We can also add a reinforcing rim on longer trays to prevent sagging. For heavy-duty applications, you might want a thicker wire rim, while lighter trays may use a simple hemmed edge. Always consider ergonomics—a rolled edge is far more comfortable to grip.
Step 8: Adding Handles, Strengthening Ribs, and Other Features
Depending on your workflow, you may need handles on one or both ends. Handles can be formed from the same sheet (cut-out handles) or welded on separately. Strengthening ribs—raised grooves pressed into the tray base—add rigidity without adding weight. They also help to prevent warping at high temperatures. We can also incorporate custom features like bar codes or laser etching for tracking, or staggered drainage holes for washing and drying.
Step 9: Surface Treatment: From Raw to Smooth-Shiny
Surface finish is about more than looks. A smooth, polished surface prevents food from sticking and is easier to clean. Common finishes include #2B (dull, matt finish), #4 (brushed), and BA (bright annealed, shiny and smooth). For better food release, we can apply a non-stick coating. For increased durability against scratching, we can also apply a hard-anodized finish on aluminum. Your choice should balance cost, release performance, and cleaning ease.
Step 10: Packaging and Sample/Prototype Approval
Proper packaging prevents damage during shipping. We typically use corrugated boxes with foam or paper interleaving to protect the surfaces. For larger orders, we may use wooden crates or steel pallets. Before mass production, we always create a prototype or sample. This allows you to test the tray in your own oven, on your existing racks, or with your actual product. We recommend verifying all dimensions, hole patterns, and overall sturdiness during this stage.
Design Checklist: What You Must Confirm Before Ordering
Before sending your inquiry, run through this checklist to avoid costly mistakes: 1) Application: What are you baking? 2) Oven type: Convection, deck, or conveyor? 3) Internal dimensions of your oven or rack. 4) Load weight: How heavy is the batch? 5) Temperature: Maximum and minimum temperatures. 6) Food contact: Will it touch acidic ingredients? 7) Cleaning method: Manual, dishwasher, or chemical wash. 8) Handle requirements: Side handles, end handles, or none? 9) Stacking: Will you stack multiple trays? 10) Perforation needs: Hole size, spacing, open area. Providing these details upfront leads to faster and more accurate quoting.
Common Misconceptions in Custom Tray Sourcing
We often see customers underestimate the complexity of tray design. For example, assuming that a thicker tray is always better—it can be unnecessarily heavy and slower to heat. Or selecting a lower-grade material to cut costs, only to face corrosion issues later. Another mistake is ignoring the tolerance. A tray that is 1-2mm off can cause problems with automatic oven conveyors or tray washers. Always discuss tolerances with your manufacturer.
Request a Quote: What We Need From You
To get an accurate quotation, please provide the following via our contact form: Quantity (annual or per order), Desired dimensions (length, width, edge height), Material grade, Thickness, Perforation details (if any), Surface finish, Any special features (handles, ribs), and Packaging requirements. Our team will review your specifications and provide a technical feedback within 24-48 hours. We don't set a minimum order quantity arbitrarily—we work with startups and global chains alike, tailoring minimums based on your specific needs.
Conclusion and CTA
Your production line deserves a tray that fits perfectly, lasts longer, and performs consistently. As a professional custom stainless steel baking tray and custom metal tray manufacturer, we are ready to turn your specifications into a reliable, high-quality product. Request a quote today or send us your drawing. Let’s engineer the solution that takes your bakery to the next level.
Frequently Asked Questions
Q1: How soon can I receive a sample? We typically produce and ship samples within 7-10 working days after design approval. Urgent samples can be expedited.
Q2: Can you match my existing tray's exact specifications? Yes, if you send us a sample or detailed drawing, we can replicate it exactly, including hole patterns and edge designs.
Q3: What is the maximum size of a custom tray? Our facility can handle trays up to 2000mm in length, but we always advise on practical sizes that prevent warping and handling issues.
Q4: Do you offer non-stick coatings? Absolutely, we can apply PTFE or ceramic coatings for easier release and cleaning, which are especially popular for baking trays.
Q5: How do you ensure quality consistency in bulk orders? We follow strict QC protocols, including dimensional checks, surface finish inspection, and material certificate verification for every batch.